
copy and open the link above for a better view!
Hello There, Visitor!
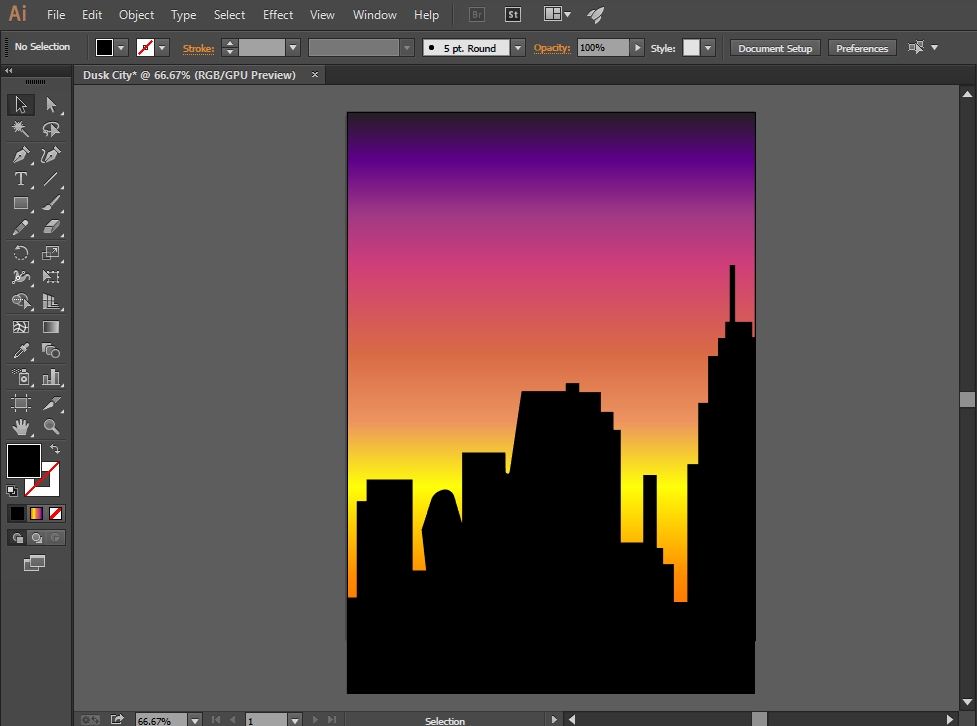
In this post, I will teach you how to make an art just like the picture above
Using Adobe Illustrator CC 2015...
Okay then, Andiamo~
First thing first! Open your new document
Making a new document by going to File > New or simply by pressing Ctrl + N


To add another 'Gradient Silder'. Press anywhere between the gradient slider's space, and make it more like this (it looks like a social app :v)

That's all for the post today!
if you still confuse how to make it, ask me in the comment below
~Have a great day~
( ͡^ ͜ʖ ͡^)
 |
| In this tutorial, I will use 'Portrait' Orientation for the Color Mode, you can use between CMYK or RGB and.. click 'OK' |
Now, let's begin the tutorial!
1. Gradient (Dusk) Background
Add a rectangle (press 'M') and cover the white layer. To make the gradient, go to 'Gradient' (by pressing Ctrl + F9). And change the Type to 'Linear', and set the 'Angle' to 90°, Now it will probably get to this

2. Color of Dusk
Have you ever see a dusk before? if you have.. you must already know the colors. Alright, now to make the 'Gradient of Dusk', double click at the 'Gradient Slider'

and set the color to orange

To add another 'Gradient Silder'. Press anywhere between the gradient slider's space, and make it more like this (it looks like a social app :v)
 |
List of colors that I use (from the bottom to the top):
|
3. Silhouette City
Using pen tool (press 'P') make the city landscape (you can make it more simple if you don't like this)
Now, let's save your project as a picture format (PNG, JPG, etc.)
How to Save your project as a Picture Format (PNG, JPG, etc.)
1. Go to File > Export
2. Change "Save as type" to 'JPG' or 'PNG' (or maybe other formats)
3. Click "Export"
4. Change the Settings according to your work
5. And now, your Art Work is done~
if you still confuse how to make it, ask me in the comment below
~Have a great day~
( ͡^ ͜ʖ ͡^)


0 comments:
Post a Comment